4th of July!!!


I decided to make an etched project representing the 4th of July celebration coming up. I read somewhere that once you try etching, you can get hooked, and that is so true. I had fun cutting out the vinyl to make my glass designs. It is an easy project and I had a hard time deciding if I should leave it alone once the etching was done, or if I should paint it, and well the paints won. I can't wait to use this as a candle holder. Here is a brief photo tutorial showing how this project was done.
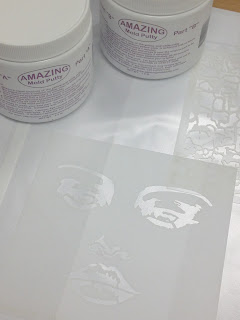
Make sure your glass is clean before adding your stencils. I hand cut my vinyl stars and strips, I suggest to have an idea of how you want to place your cut outs before you remove the backing from the vinyl.
Once your stencils are in place make sure to press on the vinyl really good to keep the etching cream from going under your vinyl images. You can now begin adding the etching cream, start from the top of your glass, I suggest you protect your hands and your work space from any spills that might happen. Keep in mind the cream needs to be added thick and in every area you want to etch. don't leave any bubbles or clear areas that are supposed to be etched.

After the 15 minutes are over, remove as much of the cream as you can and return to the bottle, yes that's right return to the bottle for this product is reusable. I used a wooden stick to add and remove the etching cream from my glass container. Do not remove your gloves, now that you removed the cream you can go and rinse and dry your glass.

Now here is the final piece, all products used to paint this glass container are from Viva Decor, one of my favorite brand of paints to use in almost every single type of project I make.


Comments
Post a Comment