Inspirational Message to my Kids!!

Hi there, I love creating just about anything, specially if I can make them one of a kind projects to share and hopefully to inspire.
This past weekend I went shopping for art supplies for my youngest who is a freshman at an art academy in Chicago and as I walked around the craft store I found some stencils, these were inspirational words, and I thought to myself, why not get these, they might come in handy, so I got them.
Well as I was doing some light cleaning around the house over the weekend, I noticed a frame I had purchased at one of the many garage sales I went to last summer, it was a simple wood frame, light brown with a floral mat insert and sure enough the photo area was a perfect fit for the stencils I had just purchased at the craft store, needless to stay the cleaning came to a complete stop and it was time to get creative.
I chose three words that I felt would be a perfect inspiration. Etching these words on the glass was the next step, and then trying to decide if I would keep the floral mat or paint over it, also the color of the frame itself, it had to be changed too, guess this frame was about to get a full make over.
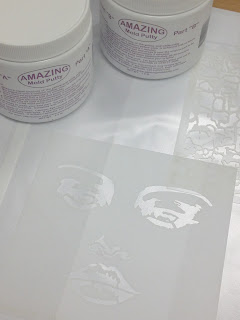
Below you can see the materials I used for this project, missing here is the silver paint from DecoArt Media fluid acrylics I used to paint the floral mat.


Here you can see what the frame looked like, I centered the words in the middle of the frame carefully.

After taking apart the frame and having only the mat and the glass, I used my masking tape to make sure I would cover the areas of the glass that I didn't want to etch, since I was planning on using the mat, I thought why etched those areas, besides in the event I don't want to use the mat it will still look nice to have the outer areas without etching.

Next step was adding the etching cream, now remember that this cream is reusable so be generous when applying the cream to your glass, I applied the cream using a wood stick, but you can use the etchall squeegee. All you have to do after this step is wait 15 minutes for the etching to take place.

Once the time is over, make sure to remove as much of the cream off your project and return it to it's original bottle.

I rinsed my glass under warm running water in my bathroom sink before removing the masking tape and the stencils, you don't want to end up with etching cream any where else, so make sure to rinse really good, dry and then remove everything to see your awesome etched results, look at the photos below to see how my glass turned out.


Now this is when I had to decide if I would leave the floral mat or not, honestly I didn't like it so I turned it over and I painted it silver.


Here is the finished piece, it was a beautiful morning outside, not much sun, but I thought it would be nice to photograph it outside.
My kids loved it, hope it gives them inspiration whenever they need it.


FYI......
I thought I would share a few tips from the Etchall website to help you out on how to etch correctly, there's a lot more information so I really suggest that before you try etching for the first time you go and check their site here FAQ's for more information, this way you will enjoy etching. Make sure to share with us all your etching projects.
- USE CAUTION with etchall® around household surfaces made of glass, mirror, marble, slate, and porcelain. This may include sinks, tubs, floor tiles, counter-tops, tabletops, etc.! When rinsing crème or dip in a porcelain sink, always flood with lots of water. Wipe accidental spillage immediately with a paper towel or sponge.
- Cover all glass on your project which you don’t want to etch with etchmask™, contact paper, or green auto tape.
- When working with glass, make sure to cover the back with etchmask™ or contact paper so as not to etch or get fingerprints on that side. Mirror backing is not affected by etchall®, so no need to cover it during etching.
- Never remove your stencil until the project is completely clean of all crème. Always remove under running water.
- Do not try to “spot” repair un-etched areas. Re-etch entire piece


Comments
Post a Comment