Spring Flowers on a Bottle!

Hi there, Spring is here, even if it's still cold you can already see a few pretty flowers here and there. I had this cute glass bottle, perfectly round so I decided to decorate it with flowers. Below you can see how I transformed a recycled glass bottle into a pretty decorative piece.
Lets start with the first product I used. It's Dip-n-etch liquid from Etchall. I will share a little bit of information about this great product, but if you click on the link above you can get all the information needed about this and all their other products.
Etchall® dip ‘n etch is a re-usable etching liquid with the consistency of water. Use by "dipping" glass objects to create an etched surface of the are submerged in this etching liquid. You can etch the entire object or you can mask areas or designs by using etchmask stencils and etchall® resist gel to create beautiful designs.
- It can be used on: glass, mirror, ceramic, porcelain, marble and slate
- It's reusable
- Can be disposed down the drain, it will not harm plumbing, flush with plenty of water
- Caution, it will etch porcelain sinks and tubs, so neutralize with water and baking soda before disposing in porcelain or ceramic sinks
Now let's get crafty!!! Time to show you how I transformed this glass bottle and gave it a new purpose.

Now, I didn't noticed that my plastic container had a small crack so I used a plastic sandwich bag to place the container inside in case any of the etching liquid would spill out. Below you can see the etching liquid and the glass bottle, just waiting the 15 minutes needed for the etching to be finished, yes it only takes 15 minutes, it's fast and easy.

Now that the 15 minutes passed, I poured the etching liquid back into it's original bottle, then rinsed out the glass bottle and dried it. can you see the difference? the part that was etched is now ready for anything I want, it's no longer glossy and has like a sandier feel, it's a perfect canvas for anything from glue, to paint. I wanted to do a mixed medium project so now it's time to show you what came next.

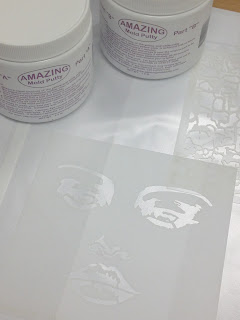
This is a specialty crafting material imported from Germany, this foil is made up of paper lined with colorful aluminum foil on both sides, it works like both paper and foil at the same time and can be used with any paper crafting tools. You can emboss, die cut, stamp it, and you can use any type of glue. You can go to their website to find out more about this product (link above).


Let's cut up some grass, here you can see what I did, I have this tiny scissors from Westcott that I use for everything, they are tiny and cut this foil paper like butter.

Here you go, the beginning of decorating. I applied the mod podge on the foil paper and wrap it around the base of the glass bottle as you can see on the photo below, I made sure to overlap in some areas by piecing pieces of the other foil paper piece.


Now I have lots of paints to use, but I recently purchased these new markers and this was a perfect project to try them out. I used the green below to show dimension on what would be a field of green grass.


Now let's get some flowers, painting little tiny flowers in different colors, I like using paint markers, sure I could stamp them or use a brush, but I think I'm going to enjoy using these markers a lot.

I decided to make some foil paper flower by using an embossing folder from Sizzix, cut them out and used the mod podge to glue them on the bottle as you can see on the photos below. To finish it up I just wrapped some lace and gold ribbon to the top of the bottle with was also painted with the blue marker.


I love using objects as canvas to paint, and etching this bottle make painting and gluing so much easier, and love the etched/frosted look of the glass bottle, it adds a lot more interest to this piece.


I hope that I have inspired to give etching a chance, they do have a special going on right now, you can get some free stencils to help you make some pretty etched gifts for Mother's and Father's day, offer is included below take advantage of this special, trust me etching is easy, fund and addictive.
_________________________________________________________________________________
Both holidays will be here before you know it, so get a head start on etching!
*Offer applies only to designs in the "Special Someone" category.


Comments
Post a Comment